Mystery Cake
 |
This mystery cake is a classic take on black and white tuxedo sophistication. There are so many games and movies dedicated to this amazing topic. Spun from real life, these movies, books and other areas of entertainment mesmerize people of all ages. Most people who love this theme have fantasized about being all the typical characters involved. This cake is a classic take on a mysterious party theme. |

This mystery cake is a classic take on black and white tuxedo sophistication. There are so many games and movies dedicated to this amazing topic. Spun from real life, these movies, books and other areas of entertainment mesmerize people of all ages. Most people who love this theme have fantasized about being all the typical characters involved. This cake is a classic take on a mysterious party theme.
My boys loved to dress up and be spies running around the house. They would set up missions for each other to solve at times. And then other times they were working together on a secret espionage mission. Our home was filled with traps and the rest of us had so much fun planning the spy party for them. We set up fingerprint stations, making your spy name, a laser obstacle course and so many more fun things. One easy thing we did was this simple mystery cake and our mission was to try something new. We tried for the first time to make cake balls that looked like tiny bombs.
How to Make the Ultimate Mystery Cake
For our spy cake or mystery cake I decided that it should really be in tuxedo colors. The guests were dressed up in evening wear to add sophistication to this celebration. On the wall we had a web of pictures of crime scenes, suspicious suspects and the links between were the red yarn charting out the crime links. This became our color theme for both the cake and cake pops.
The mystery cake was made out of a nine inch round cake pan. I made this cake a double layer, by using two cake pans and doubling the recipe. I first traced the cake pan shape onto parchment paper. I trace it by etching the paper with a pair of clean scissors. Then I cut out the shape and secure it into the pan by using a dot of cooking spray on the bottom of the pan. I then coat the sides with the cooking spray. I made chocolate cake batter and filled it into the pan. Once into the pan I tap the pan on the counter top to help release any air bubbles. I then cooked it for a just slightly lesser temperature than recommended and baked it for a slightly longer period of time. This way the mystery cake was more level when the baking was completed. Once the cake was fully baked I also tested it with a toothpick. As long as it is clean when poking at the cake I know it is all ready. I then let the cakes cool until it naturally pulled from the edge of the cake pan. Then I gently pop it out using only gravity. I quickly then turn the cake back to the right direction and let them fully cool.
I often bake the cakes the day before and then decorate them the day after. Before decorating I leveled the cake with my cake leveler. I made the cakes the same height and placed a layer of icing in between the layers.
I used a white icing and applied it generally with an angled cake spatula. I’m not the hugest fan of icing, but on this cake it was necessary to make it thick to cover the chocolate inside of the cake.
|
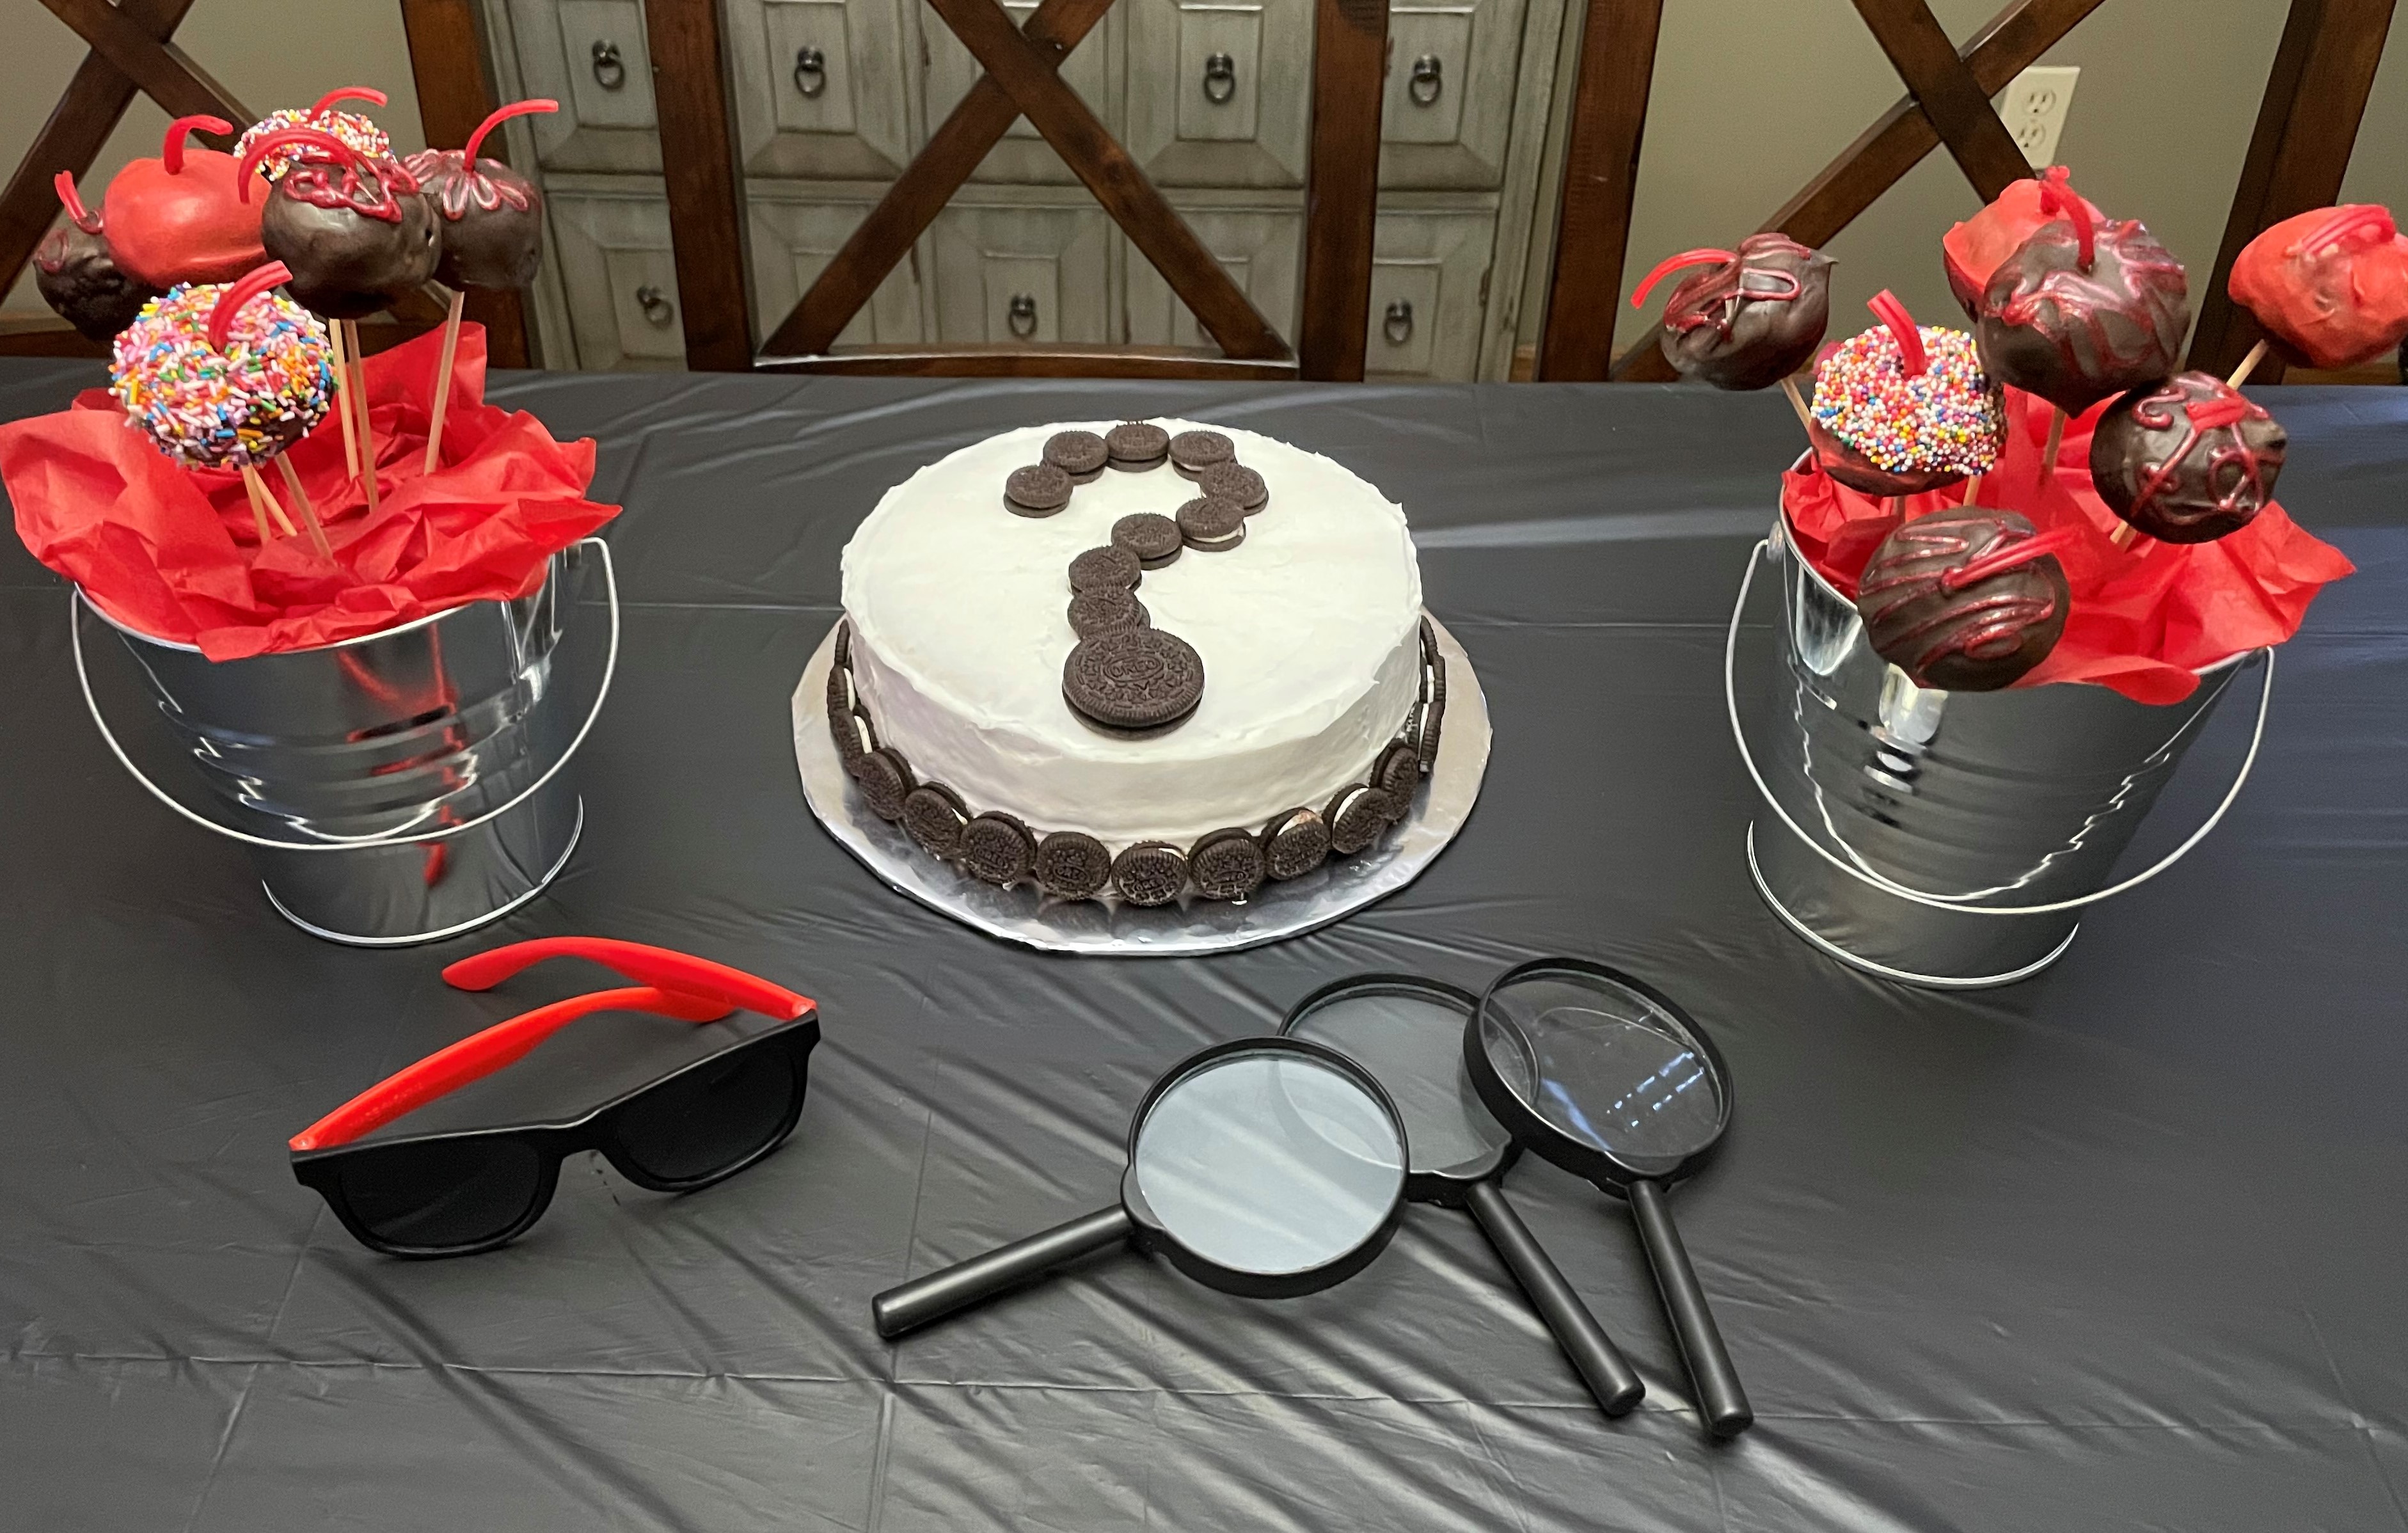
I then used two sizes of Oreo cookies. I made a little indent using a toothpick on the top of the cake for where I was hoping to make the question mark. Then I covered the indent with different sized Oreo cookies. I used the snack size and regular sized cookies. To complete the look I also applied the snack size cookies to the bottom of the cake. This made a simple classic look to this mystery cake. |
 |
I then used two sizes of Oreo cookies. I made a little indent using a toothpick on the top of the cake for where I was hoping to make the question mark. Then I covered the indent with different sized Oreo cookies. I used the snack size and regular sized cookies.
To complete the look I also applied the snack size cookies to the bottom of the cake. This made a simple classic look to this mystery cake.

How to Make Cake Pop Bombs
|
I am always surprised at how simple it is to make cake pops. For the base you need a cake that is all broken up. You can use leftover cake that has been cut off of another to make a design or you are able to make a cake and then break it up. I just break it up with my washed clean hands. Next you add icing to the bowl that has the cake in it. You can either make icing or use store bought. Both work fine for this application. Mix both ingredients together. |
 |
I am always surprised at how simple it is to make cake pops. For the base you need a cake that is all broken up. You can use leftover cake that has been cut off of another to make a design or you are able to make a cake and then break it up. I just break it up with my washed clean hands.

Next you add icing to the bowl that has the cake in it. You can either make icing or use store bought. Both work fine for this application. Mix both ingredients together.
 |
Then get a small piece of saran wrap. Use the saran wrap to pick up some of the cake mixture. Mold it into a round shape and then place it aside. Make as many cake pops as you wish. After they are ready, place a stick or holder into the cake pop. This will create your handle. Heat up some candy melts in your desired color. I used a chocolate and red color. Hold the handle of your cake pop and dip them one at a time into the warmed candy melt. I sometimes use a spoon to help get the cake pop totally covered. |

Then get a small piece of saran wrap. Use the saran wrap to pick up some of the cake mixture. Mold it into a round shape and then place it aside. Make as many cake pops as you wish. After they are ready, place a stick or holder into the cake pop. This will create your handle.
Heat up some candy melts in your desired color. I used a chocolate and red color. Hold the handle of your cake pop and dip them one at a time into the warmed candy melt. I sometimes use a spoon to help get the cake pop totally covered.
Set them aside as you work your way through the rest covering them with the candy melt. I then made a mixture of designs. I used a variety of sprinkles, and a design gel. To finish them off I cut a small piece of licorice that I placed into cake pop. This was to look like the bomb wick.
I just placed a few out for the display, but had a lot of extras set aside in case the spies wanted lots of these cake pops. I loved the way these cake pop mini bombs turned out.

We hope you enjoy making your very own mystery cake and cake pop bombs.


